Art with Ms. Djordjevic
  • Home
  • Contact
  • Classes
    • Photo I
    • Photo II
    • Creative Photo
    • Photo Portfolio
    • Advanced Photo
  • Resources
  • Home
  • Contact
  • Classes
    • Photo I
    • Photo II
    • Creative Photo
    • Photo Portfolio
    • Advanced Photo
  • Resources

Photo I

This class explores the basics of traditional black and white photographic printing as well as digital photographic processes using Adobe Photoshop. We will examine both the aesthetic and technical aspects of the photographic process through several method based assignments. The uses of metering, lighting, composition, and technical aspects of the camera will be reviewed during class to give students a basic understanding of the art of photography.

Photo i Course expectations

Composition :: The Rule of Thirds and the Golden Ratio

9/17/2020

 
Picture
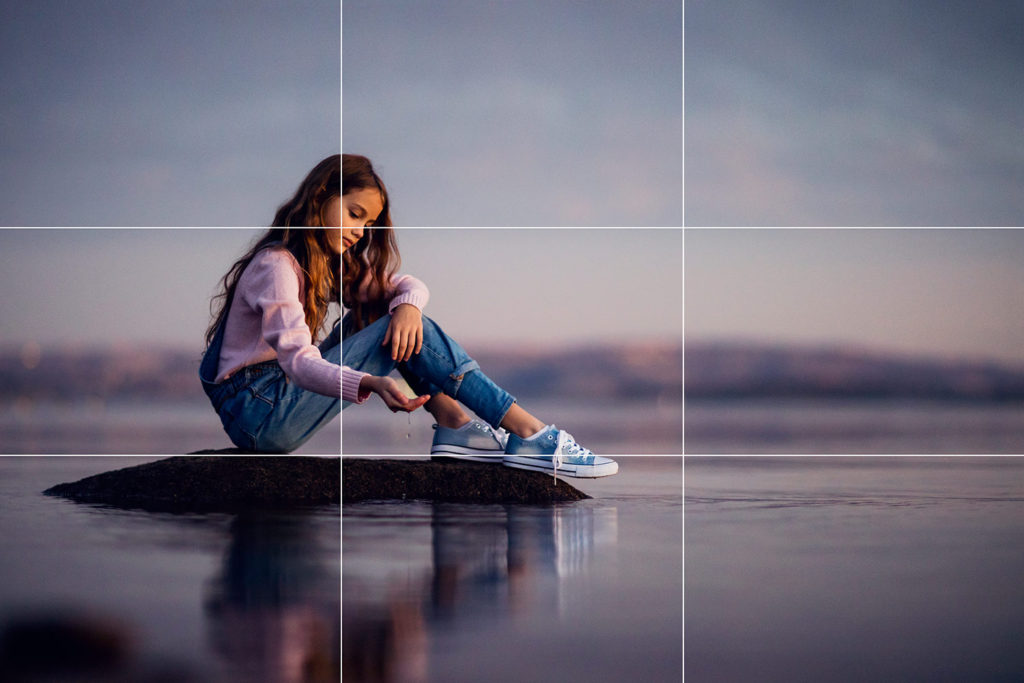
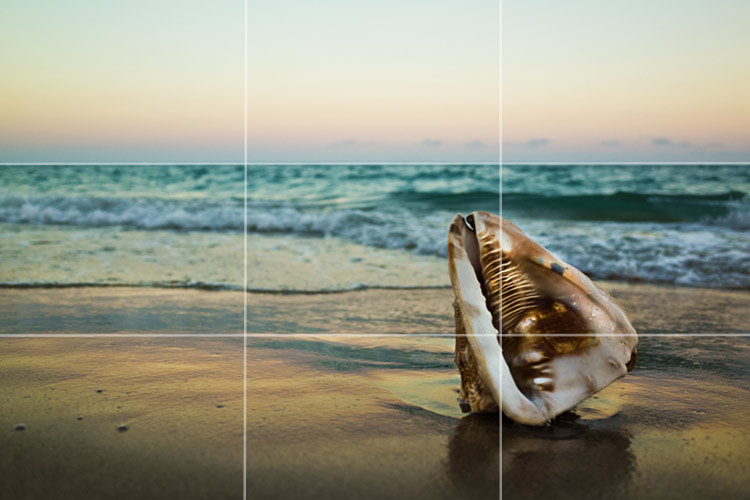
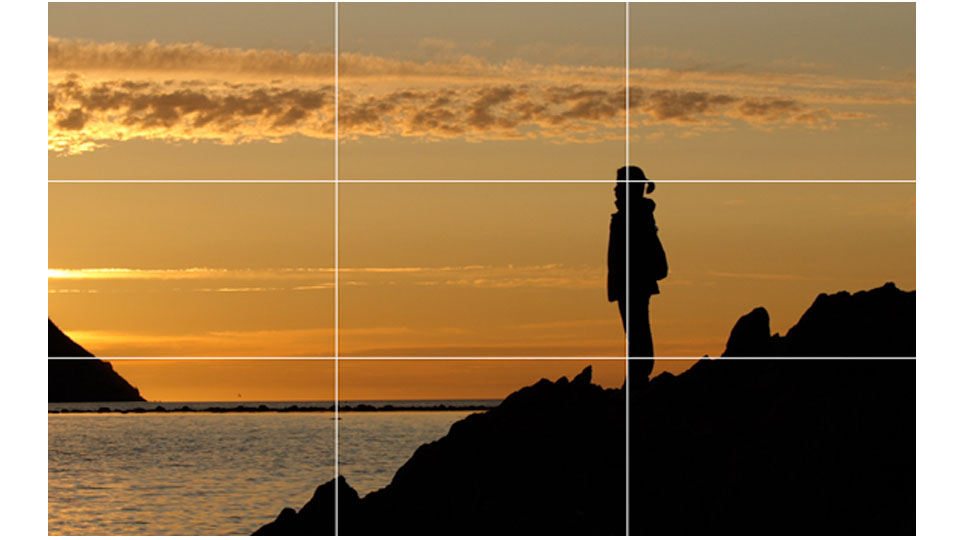
There are several ways to create interesting images, even if you are using a point and shoot camera or your phone. Most of what makes an image wonderful, impactful, and interesting has nothing to do with the tool (the camera or the lens) but everything to do with the artist who is taking the image and how they composed the image. Here are a few quick compositional tools to help create stronger compositions in your photographs. Starting with the rule of thirds and the golden ratio we can explore these fundamental compositional elements. 
In photography, there are several ideas behind the creation of a strong composition. The first of these is called the rule of thirds, which refers to breaking your frame into three parts either horizontally or vertically and weighting the composition along one side or the other and not fully centering every image. The second is called the golden ratio or golden spiral, putting more focus in the corners of the image and spiraling outward. Both are extremely successful but should be considered while photographing and not after the fact.
Another major compositional technique is called leading lines—this refers to perspective or actual lines in the image leading to the part of the image you want your viewer to notice. It is essentially highlighting the important subject of your photograph. Last is framing--use natural framing (windows, doors, etc.) or make sure to compose your image how you want it to look while taking the photo and not later in post-production. Cropping is an option but it is always better to frame the image with intent.
 Assignment:
Shoot between 25-50 images showing off the rule of thirds and a second compositional element from the above video (there are 8 more). You should be shooting brand new photos using your phone (hint: try keeping them in separate project folders on your phone to make life easier later on). You will be editing and passing in your best 10 photographs.

Steps:
  • Go outside, starting your shoot with outdoor lighting is very helpful
  • Consider the compositional challenge each time you take a photo "does this show the rule of thirds?" "Does this show the composition in an interesting way?"
  • Sometimes photographing nature and natural elements is easier than people to start
  • Once you're done shooting for the day, be sure to save photos in a new folder so we can find them later for download. You may shoot over several days and saving them in one place is very helpful

How to take better photos with your iPhone

Here are some quick tips to maximize your photo taking success.
1. First things first...don't zoom! This adds a lot of digital noise to your image and instantly decreases quality. If you need to get closer I would crop something out in post-production rather than zoom in during the photo taking process. But better yet, physically get closer to your subject.
2. Don't use flash, if you need more light use a friend's phone to add "off-camera" lighting.
3. Try using the grid option on your camera to help compose your images (hello rule of thirds!).
4. Change your exposure. While taking a photo, click on the screen to focus and expose for your subject, when the box with the sun pops up slide your finger up or down to brighten or darken your image.

Below is a quick video with 5 tips for making better iPhone photos. 

Comments are closed.

    Enter your email address:

    Delivered by FeedBurner

    Archives

    January 2021
    December 2020
    September 2020
    March 2020
    February 2020
    January 2020
    December 2019
    November 2019
    October 2019
    May 2019
    April 2019
    March 2019
    February 2019
    January 2019
    September 2018
    September 2016
    April 2015
    September 2014

    Categories

    All

    RSS Feed

Proudly powered by Weebly