Art with Ms. Djordjevic
  • Home
  • Contact
  • Classes
    • Photo I
    • Photo II
    • Photo III :: Semester I
    • Photo III :: Semester II
    • Photo IV :: Advanced Photo
  • Resources
  • Home
  • Contact
  • Classes
    • Photo I
    • Photo II
    • Photo III :: Semester I
    • Photo III :: Semester II
    • Photo IV :: Advanced Photo
  • Resources

Advanced Photography

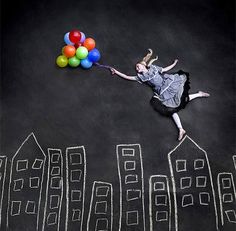
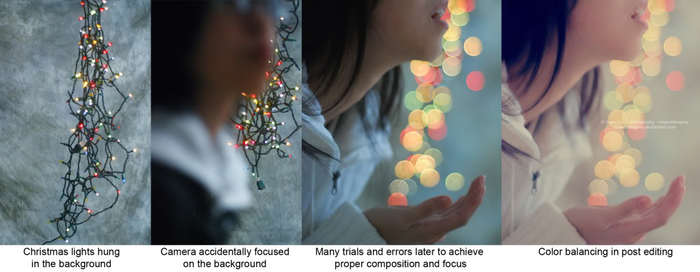
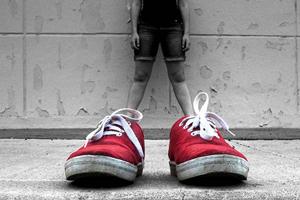
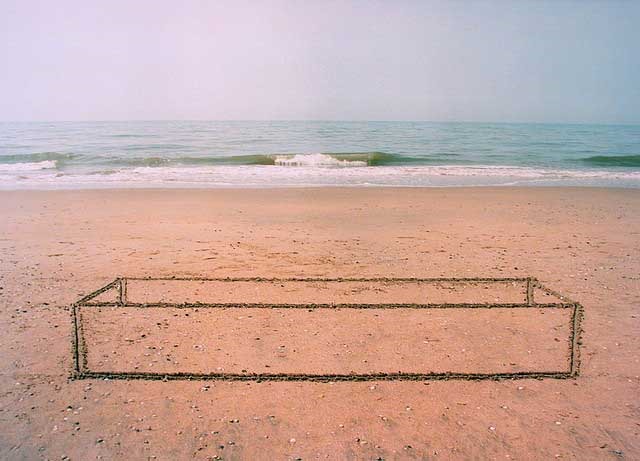
Advanced photography is designed for those students who are considering photography as a profession or planning to attend an art college. This course focuses on students’ independent photographic work, based on a series of self-assignments that will help to narrow down a focus for their thesis. Students will be also be responsible for exhibiting their artwork throughout the school and in the school gallery.
advanced photo Course Expectations

Alternative Light Sources

10/25/2019

 
Picture
What makes for an alternative light source? Is a lamp an alternative light source? What about a sunset? For this project you are going to focus on changing the regular natural light source, using reflections, gels, neon lights, and even twinkle lights to make a more interesting image. Portraits work particularly well for this project but is not required. This is a test in making imagery that isn't straightforward. What about using car lights, or a flashlight to light your subject. How about moonlight...can that even be done? Sparklers? Maybe...let's have some fun!
Assignment:
Photograph 10 different alternative light source images. Consider what you are using for your alternative light source and how you can make these images feel more interesting.  Each of the 10 alternative light source should be strong but do not all have to have different light sources, you can experiment quite a bit within one new light source—I'd like to see 3 different kinds of light sources though. You will be passing in all 10 images and printing your top 3 images.

Steps:
• Start small and easy—like adding a colored gel or cellophane to your phone light or your room lamp
• Using candles and sparklers at night may be a bit tougher to get a good exposure, but can be more fun 

​Resources: J Fotography,  Forced Perspective Pinterest board 

Forced Perspective

10/11/2019

 
Picture
Forced perspective is a photographic technique that uses an optical illusion to make something appear larger, smaller, closer, or farther away than it is (think of people holding up the leaning Tower Of Pisa). The photographer literally forces her viewer to see the scene as she wants to present it to you. Sometimes it's as simple as flipping the image upside down or 90 degree counter clockwise, other times it's by using shallow depth of field, and often it takes some forethought. Check out this tutorial by J Fotography on how to do forced perspective with bokeh. Or Michael Paul Smith who makes model cars and creates a fictional town with his forced perspective photography. ​
Forced perspective with bokeh :: from J Fotography
Picture
Assignment:
Photograph 10 different forced perspectiver images. Consider the scale of your images, the seriousness or humor,  or whether or not you want your audience to believe your image or be confused by it. Each of the 10 forced perspectives should be strong. You will be passing in all 10 images and printing your top 3 images.

Steps:
• Start small and easy--don't be overwhelmed by large ideas at first, just have fun with it
• Consider the scale of your images, do you want to make something small feel much larger or vice versa?
• Pay attention to your f-stop--large f-stop will aid in making the background a part of the image, low f-stop will create a dreamier effect or allow you to use bokeh to your advantage​
• Consider drawing or making a scene yourself if you are having trouble finding it in nature

​Resources: J Fotography,  Forced Perspective Pinterest board

Minimalism

10/7/2019

 
Picture
Minimalism in photography is a nice way to simplify your process. There comes a point in our photographic careers where we want to keep putting more and more into our photography, so to combat that, this is an exercise in putting less into our photographs. Sometimes, less is more. Minimalism focuses on extremely bold color and usually has only one main subject. 
Assignment
You must photograph a set of images focused on minimalism. Definitely think about the use of negative space, allowing your one main subject to stand out. Bold colors or high contrast in black and white can help your viewer to focus on the important aspects. Don't forget to remove distractions in the frame and take out clutter or anything that appears hectic. This is a tough exercise for even the most seasoned of photographers. 

Steps
  • Minimalist photography is not finding something that is minimal, but intently framing your photo to be minimal. This takes more work from the photographer and is an exercise in seeing. 
  • Focus on bold color (or high contrast black and white) and negative space. Allow there to be very few distractions in the frame. 
  • Try to limit your focus to one main subject (i.e. birds on a wire, a slice of light, one loop of a cord, etc.)
  • Light is your friend, sometimes light will create the minimalist look for you. Push that idea of light!

Objective: To photograph with intent; framing the image to limit distractions and focus on simplifying the image. 

Resources: Minimalism Pinterest Board

    Author

    Write something about yourself. No need to be fancy, just an overview.

    Archives

    December 2020
    January 2020
    October 2019
    September 2019
    November 2018
    September 2017

    Categories

    All

    RSS Feed

Proudly powered by Weebly