Art with Ms. Djordjevic
  • Home
  • Contact
  • Classes
    • Photo I
    • Photo II
    • Photo III :: Semester I
    • Photo III :: Semester II
    • Photo IV :: Advanced Photo
  • Resources
  • Home
  • Contact
  • Classes
    • Photo I
    • Photo II
    • Photo III :: Semester I
    • Photo III :: Semester II
    • Photo IV :: Advanced Photo
  • Resources

Ceramics I

Ceramics is an elective, full year course, designed to let you experience the unique qualities of clay. This studio art course introduces clay as a medium for visual expression in three dimensions. Basic hand-building techniques as well as an introduction to wheel thrown pottery will be experienced. Students will be instructed in a variety of glazing techniques. Demonstration, work and discussion will help you feel confident, as you learn to express yourself in clay.
Ceramics I Course expectations

Textured Vase

9/18/2019

 
Picture
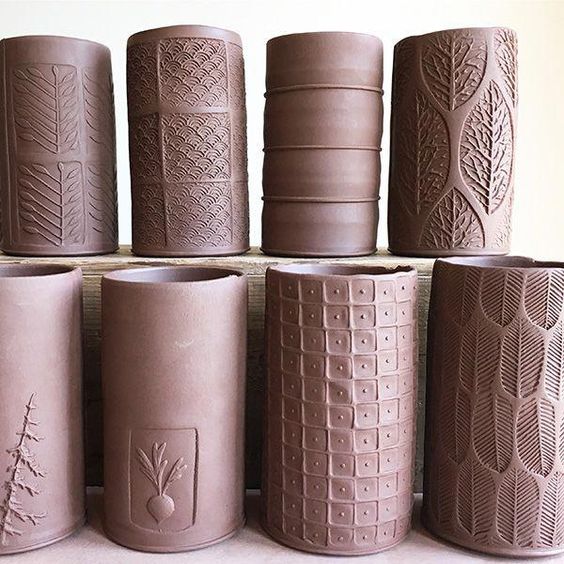
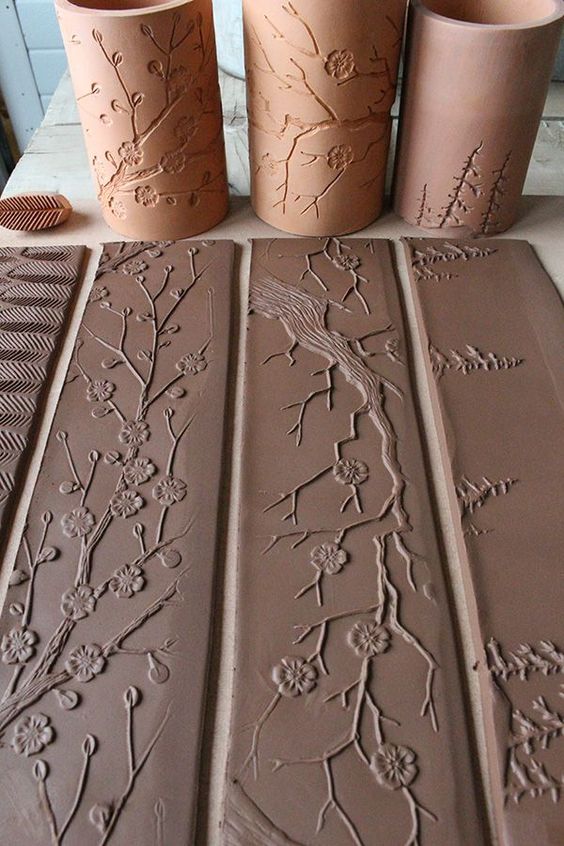
Textured vases have long been used in the home as decoration. They can stand alone, be filled with flowers, hold kitchen utensils, or be grouped together. This project is another exploration in using the textured blankets and rollers on slab, plus adding textured rims and bases and creating a bottom of the vase. This is getting used to building with slab and trying to create an upright vase.
Assignment:

The assignment is to create a textured vase with even thicknesses around that stands about 6"-8" tall. The textured rim and base should be about 1" each and can match or should compliment the texture you have chosen to put on the body of the vase.  

Steps:

• You will be making a large piece of slab for the body of the vase, 2 small 1" strips of slab for the top and bottom textured edges, and a small circle of slab for the bottom of the vase
• grab a larger softball size of clay, make sure to wedge the clay (about 100 times) before you start to make your vase
• consider what the final height of the vase will be and roll out your piece of slab giving enough width to stand at least 6" tall. 
• once rolled out, cut your slab in a long rectangle, long enough to wrap around one of the paper towel rolls we have to help create the long thin body of the vase. 
​• make a small circle of slab to attach to the bottom of the vase

• once rolled around the paper towel roll, take your excess class and roll out another piece of slab, big enough to make two 1" strips for the top and bottom. Be sure not to make extremely thick or extremely thin strips of clay because they will be difficult to attach. 

​

Objective: To get comfortable with rolling out and working with slab. From rolling out slab to scoring and attaching different pieces of clay. 

Comments are closed.

    Archives

    February 2020
    January 2020
    December 2019
    November 2019
    October 2019
    September 2019

    Categories

    All

    RSS Feed

Proudly powered by Weebly